Welcome

WELCOME


Welcome to the blog for our campervan build

This project began in May 2020 during the 'lockdown' in the UK due to COVID-19. We were supposed to be touring Europe in our existing camper conversion 'Movano The Van Hoe' but this obviously wasn't going to be possible... So after finishing a pretty ambitious Hot Tub Trailer build (see the blog here) we decided we needed another project to keep us occupied during however many weeks left of lockdown.

We put Movano The Van Hoe up for sale and bought a Renault Master which we will convert over the coming weeks/months.

We are fortunate in that Elliot has a fully equipped workshop with tools and space to work, and we're also fortunate in that this is Elliot's second camper conversion, so we're not totally winging it!

This is a blog of the full build and I make no apologies that it is very photo heavy. The primary purpose of the blog is to document this build both for our own records, and for anyone else who's interested.

We plan on touring around Scotland with our Trailer Hot Tub when travel restrictions are relaxed enough to allow this.

Disclaimer: This is NOT meant as a tutorial. Do not try this at home. Always seek professional expert advice.

Friday, 29 May 2020

We cut a hole in Master 'Splores...

So today the side window arrived!! 

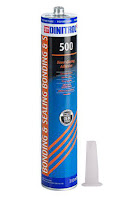
We've got a fixed bonded glass window with the privacy glass for the driver's side, purchased from Leisure Vehicle Windows. It comes in a kit with the bonded glass side window, isopropyl alcohol wipes to clean the surfaces, Dinitrol 530 glass/paint primerDinitrol 500 fast-cure bonding adhesive, and edging trim. 


First things first... Read the instructions!!!


First we marked out inside where the window would be to make sure we were happy with that. 


We then removed the vertical struts from the window area using a grinder.


We then very accurately marked out where the window would come to on the outside.


Pilot holes were drilled first...


Then the curved corners were cut out using a drill-operated nibbler...


The straight parts were cut using a jigsaw...


 ... and then we were faced with a GIANT HOLE.


We trimmed the edge of the hole with the supplied black edge trim, which was cut to length.


The ceramic surround of the window unit was first cleaned of any grease with the supplied isopropyl alcohol wipes, and then it's primed using the Dinitrol 530 glass/paint primer also supplied in the kit. This is also used to prime the edge of the van body where the adhesive will stick... This is left to dry for 10 minutes...


Then the Dinitrol 500 fast-cure bonding adhesive is applied in a continuous bead around the periphery of the window-hole... 


The window is lifted into place, smooshed onto the adhesive and held in place for ten minutes (this was a two-person job so there's no photos!)

Then it's taped up and left overnight to cure...


Today we also worked on more of the ply lining. We've now got almost all of the insulation in place. More panels were measured and ply wood cut to size. Carpet was glued onto these again with spray adhesive. 

They are ready to glue into place now... 


Thursday, 28 May 2020

Stretchy carpet

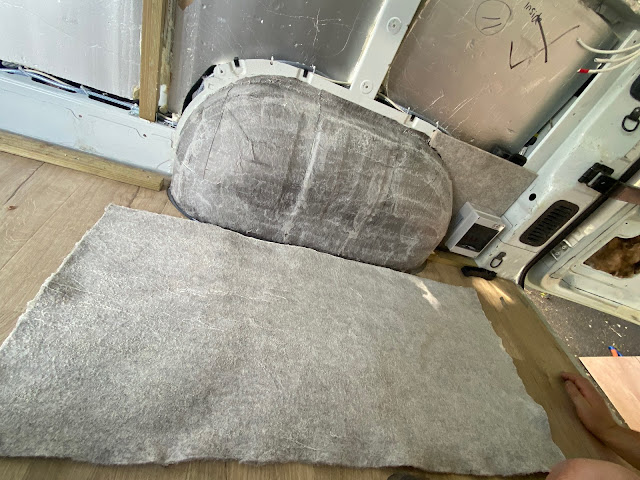
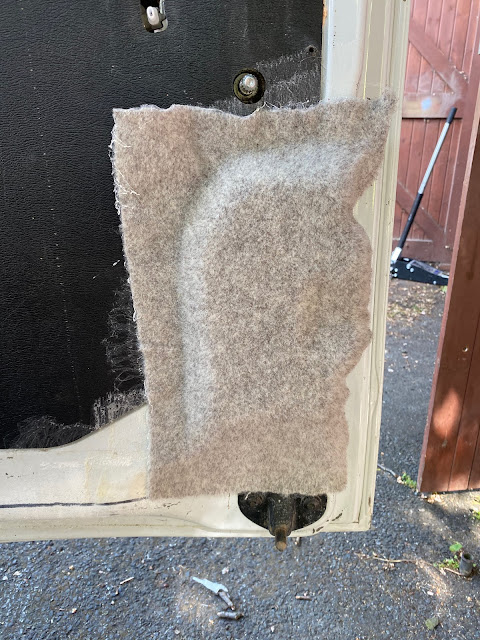
Today I was introduced to a new wondrous material; stretchy carpet. We're using this for the areas where we need to carpet over curvy awkward shapes such as the wheel arches and the curvy bits that will be seen behind the carpeted panels on the back doors. We're using "Easiliner" stretch van lining in the same colour as the Veltrim.

To use this stuff, spray adhesive is used, just like the normal Veltrim, this is sprayed on both surfaces and allowed to dry for 30 seconds.


When it's being applied it's important to stretch the carpet over the surface, smoothing out any creases, and it will stretch and mould to the surface being covered.


The same process is repeated on the curvy bits of the back doors that will be seen behind our already-carpeted ply panels. 


Woooo the back doors are now actually finished! Elliot thinks we're 1/4 of the way through this build... I disagree, I think we have a loooooong way still to do.


Tuesday, 26 May 2020

Another back door, fluff and icing

Today we managed to carpet the ply for the other back door and started on securing the insulation.

We are using Knauf Eko Roll loft insulation in any parts of panels with moving parts (e.g. the bottom panel of the doors which houses the handle and locking mechanism). This stuff looks super fluffy but it's actually irritating to the skin and not a comfy place for a nap. It's easy to use, just rip apart to size and stuff in the holes... The parts using the Eko Roll are covered are vapour barriered using the same 4mm PET bubble insulation that's under the floor, which is foil taped into place. The reason we've created this vapour barrier is because as there's some chat that the Eko Roll insulation can absorb moisture. (The last van conversion used a similar loft insulation and hasn't encountered any moisture problems, but we want to err on the side of caution!)


Most of the insulation however is using 50mm thick Celotex insulation board which has already all been cut to size (see previous post!)

Next we got to play with some fun skooshy chemicals... The Celotex boards were affixed to the inside panels of the van with Soudall adhesive foam... Which is expensive but very, very, very sticky! 


It's applied around the edges of each insulation panel, looking very much like strawberry icing, and allowed five minutes to become 'stringy' and then it's pressed onto the panel of the van. 


The adhesive is allowed to dry for half an hour and then we've used Soudal expanding foam around the periphery to further insulate and secure the boards. This stuff is great fun! 


We used foil tape to 'control' the expanding foam and keep it where it's meant to be!


This will all be left overnight to dry, and we'll trim any excess expanding foam tomorrow. There's some panels we couldn't complete today as we need to be further along in the build (e.g. have cables finalised)

(The smily faced and ticks is our own little code to indicate which panels are completed in terms of insulation!)


Monday, 25 May 2020

BBQ, Battening and one Back Door

We both had to do some actual real-life work this morning, and had a wee cheeky barbecue outside the workshop before even starting on the van this afternoon.


We've added vertical battening to support the 'walls', using the same 38 x 25mm treated timber as the horizontal battens, secured to the van chassis with the use of 20mm angle brackets and the battening sandwiched together where needed using Sikaflex.

We plan on having 'cubby holes' within the walls, where we can store clothes and other stuff. This is to utilise the space otherwise lost in the curve of the van. (I'm sure this will make much more sense later on in the build!!)


We noticed two rivets on the locking mechanism of the back door were loose so these were drilled out and replaced. I dunno, I thought this was cool. It's very secure now!


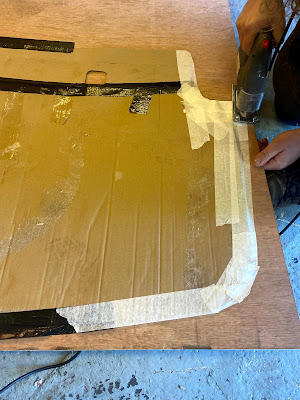
Next was to template the first of the carpeted panels. We've started with the back doors as these can be finished first. To template, a piece of cardboard is stuck to the door and the margins of where we want the plywood panel to finish are marked out accurately using masking tape around the edge.


The cardboard template is then placed onto the piece of plywood and the shape cut out using a jigsaw.


The plywood is then tried for size, and trimmed further if need be.


Oh! Here's our HUGE roll of Veltrim


We've chosen to carpet the interior in Veltrim as its cozy and durable, and we've chosen their 'Stone' colour. 

The Veltrim is fixed to the plywood with contact adhesive, folded around the back, and the excess trimmed off using a Stanley utility knife. 


The finished panel was screwed to the chassis of the van with self drilling screws.  It's so nice to have one tiny part of the van looking 'finished'!