We've added vertical battening to support the 'walls', using the same 38 x 25mm treated timber as the horizontal battens, secured to the van chassis with the use of 20mm angle brackets and the battening sandwiched together where needed using Sikaflex.
We plan on having 'cubby holes' within the walls, where we can store clothes and other stuff. This is to utilise the space otherwise lost in the curve of the van. (I'm sure this will make much more sense later on in the build!!)
We noticed two rivets on the locking mechanism of the back door were loose so these were drilled out and replaced. I dunno, I thought this was cool. It's very secure now!
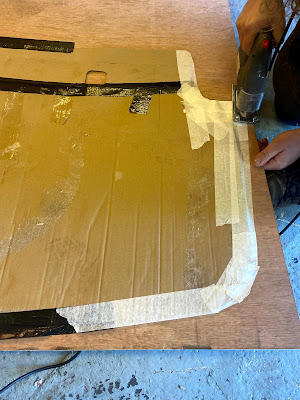
Next was to template the first of the carpeted panels. We've started with the back doors as these can be finished first. To template, a piece of cardboard is stuck to the door and the margins of where we want the plywood panel to finish are marked out accurately using masking tape around the edge.
The cardboard template is then placed onto the piece of plywood and the shape cut out using a jigsaw.
The plywood is then tried for size, and trimmed further if need be.
Oh! Here's our HUGE roll of Veltrim!
We've chosen to carpet the interior in Veltrim as its cozy and durable, and we've chosen their 'Stone' colour.
The Veltrim is fixed to the plywood with contact adhesive, folded around the back, and the excess trimmed off using a Stanley utility knife.
The finished panel was screwed to the chassis of the van with self drilling screws. It's so nice to have one tiny part of the van looking 'finished'!


