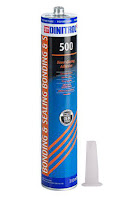
We've got a fixed bonded glass window with the privacy glass for the driver's side, purchased from Leisure Vehicle Windows. It comes in a kit with the bonded glass side window, isopropyl alcohol wipes to clean the surfaces, Dinitrol 530 glass/paint primer, Dinitrol 500 fast-cure bonding adhesive, and edging trim.
First things first... Read the instructions!!!
First we marked out inside where the window would be to make sure we were happy with that.
We then removed the vertical struts from the window area using a grinder.
We then very accurately marked out where the window would come to on the outside.
Pilot holes were drilled first...
Then the curved corners were cut out using a drill-operated nibbler...
The straight parts were cut using a jigsaw...
... and then we were faced with a GIANT HOLE.
We trimmed the edge of the hole with the supplied black edge trim, which was cut to length.
The ceramic surround of the window unit was first cleaned of any grease with the supplied isopropyl alcohol wipes, and then it's primed using the Dinitrol 530 glass/paint primer also supplied in the kit. This is also used to prime the edge of the van body where the adhesive will stick... This is left to dry for 10 minutes...
Then the Dinitrol 500 fast-cure bonding adhesive is applied in a continuous bead around the periphery of the window-hole...
The window is lifted into place, smooshed onto the adhesive and held in place for ten minutes (this was a two-person job so there's no photos!)
Then it's taped up and left overnight to cure...
Today we also worked on more of the ply lining. We've now got almost all of the insulation in place. More panels were measured and ply wood cut to size. Carpet was glued onto these again with spray adhesive.
They are ready to glue into place now...


