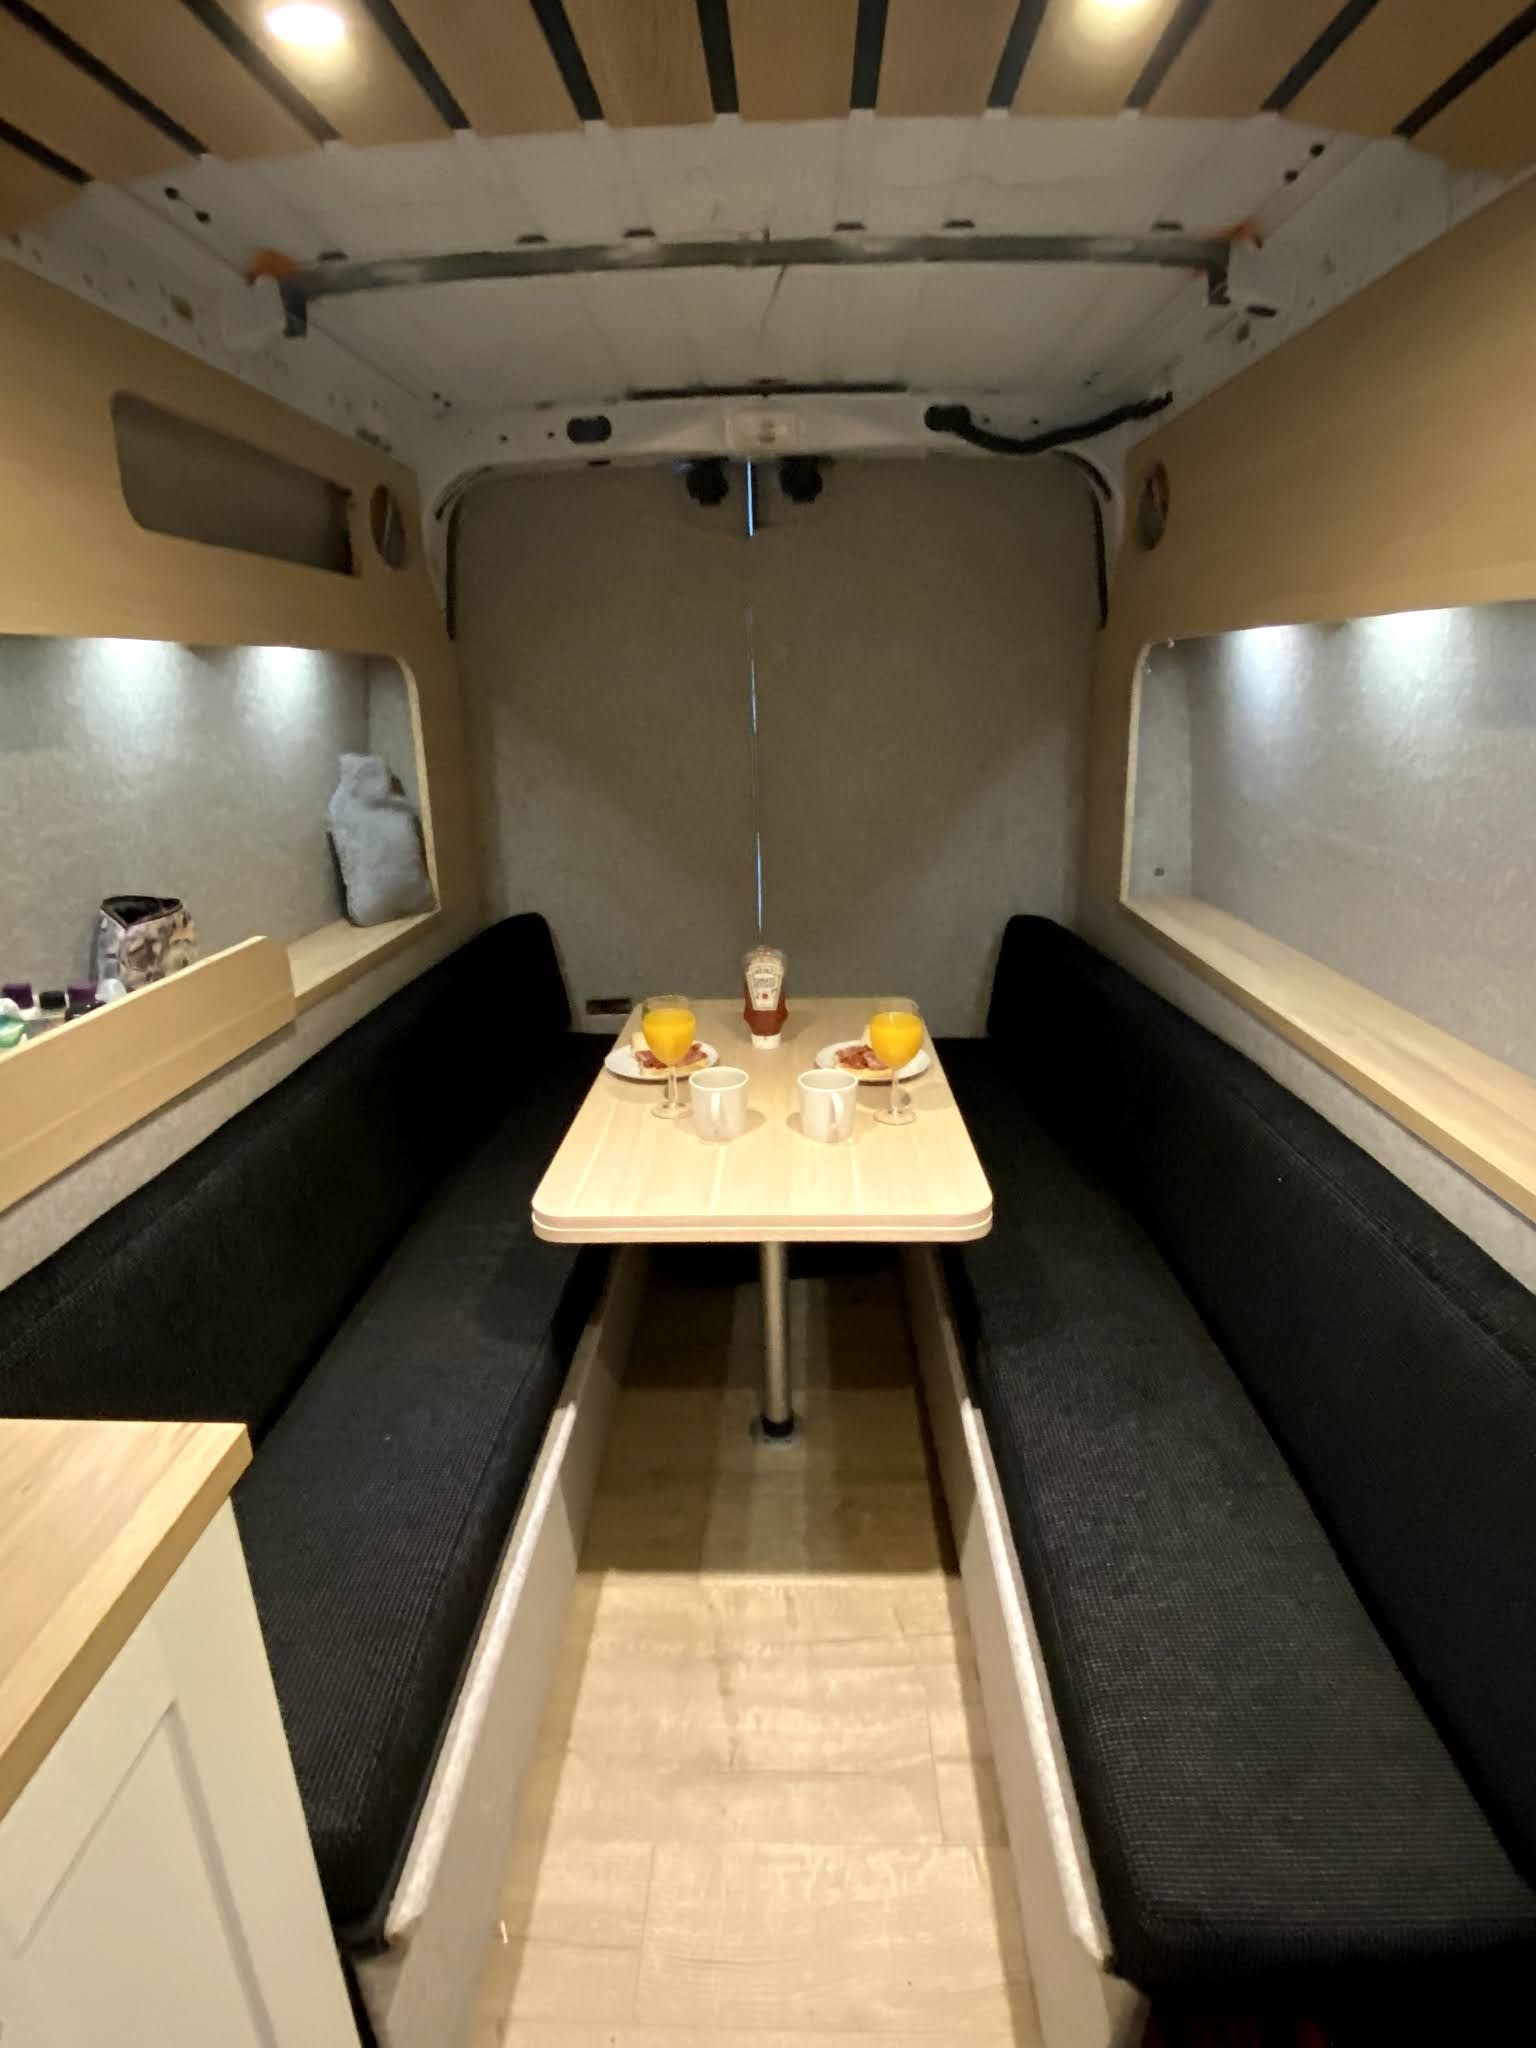
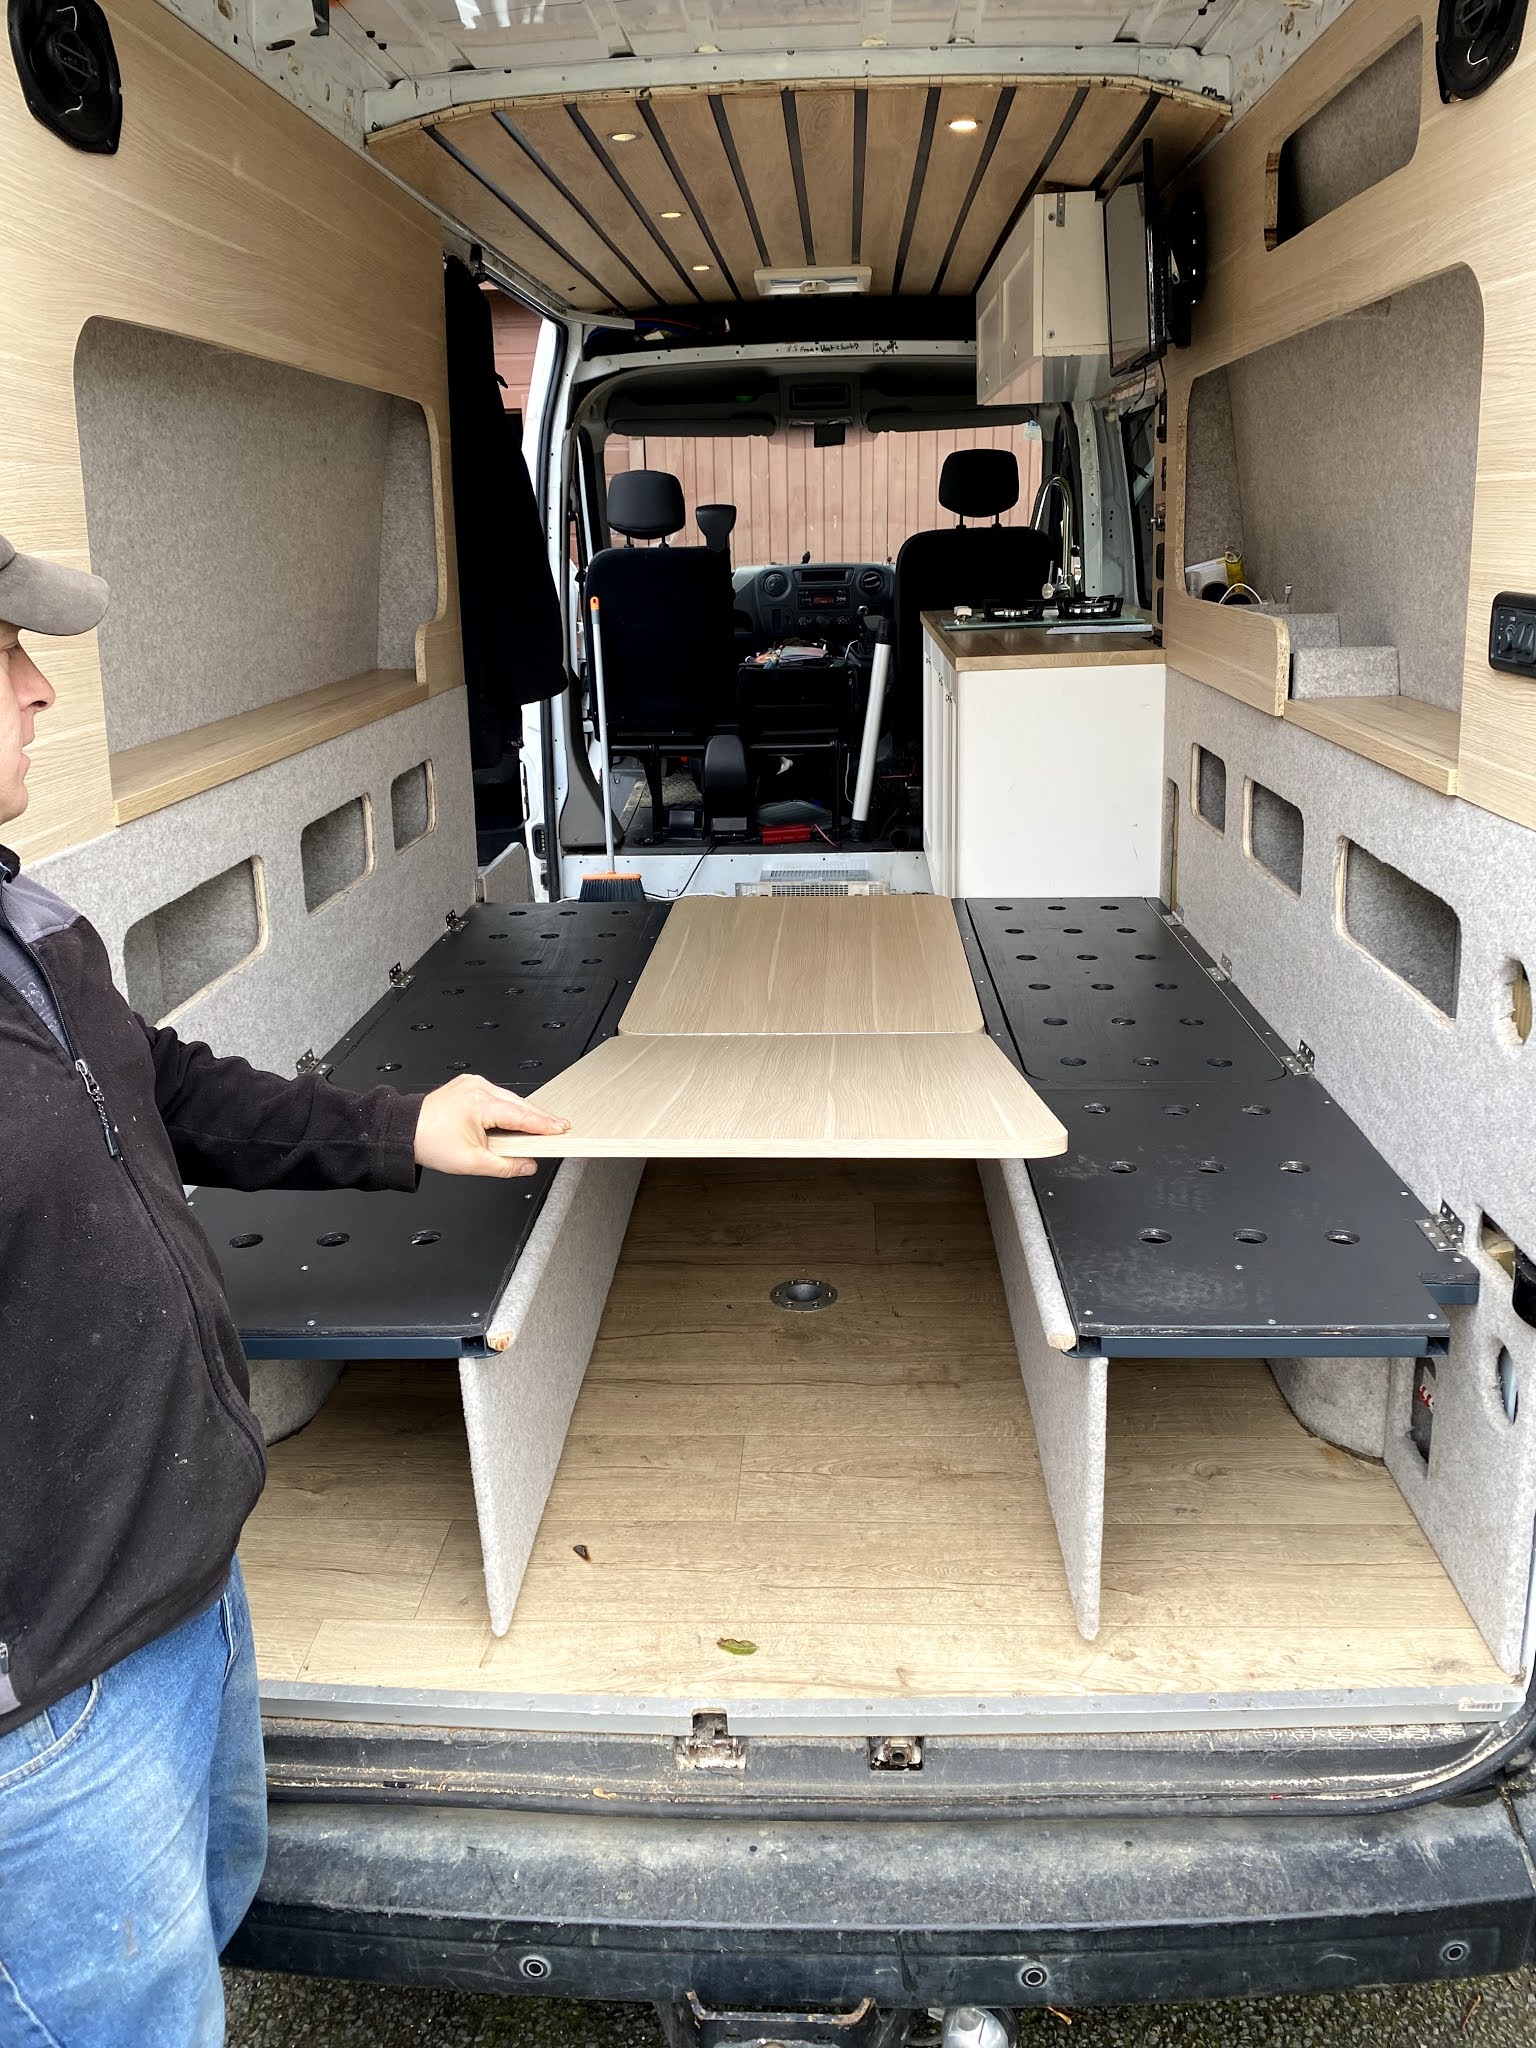
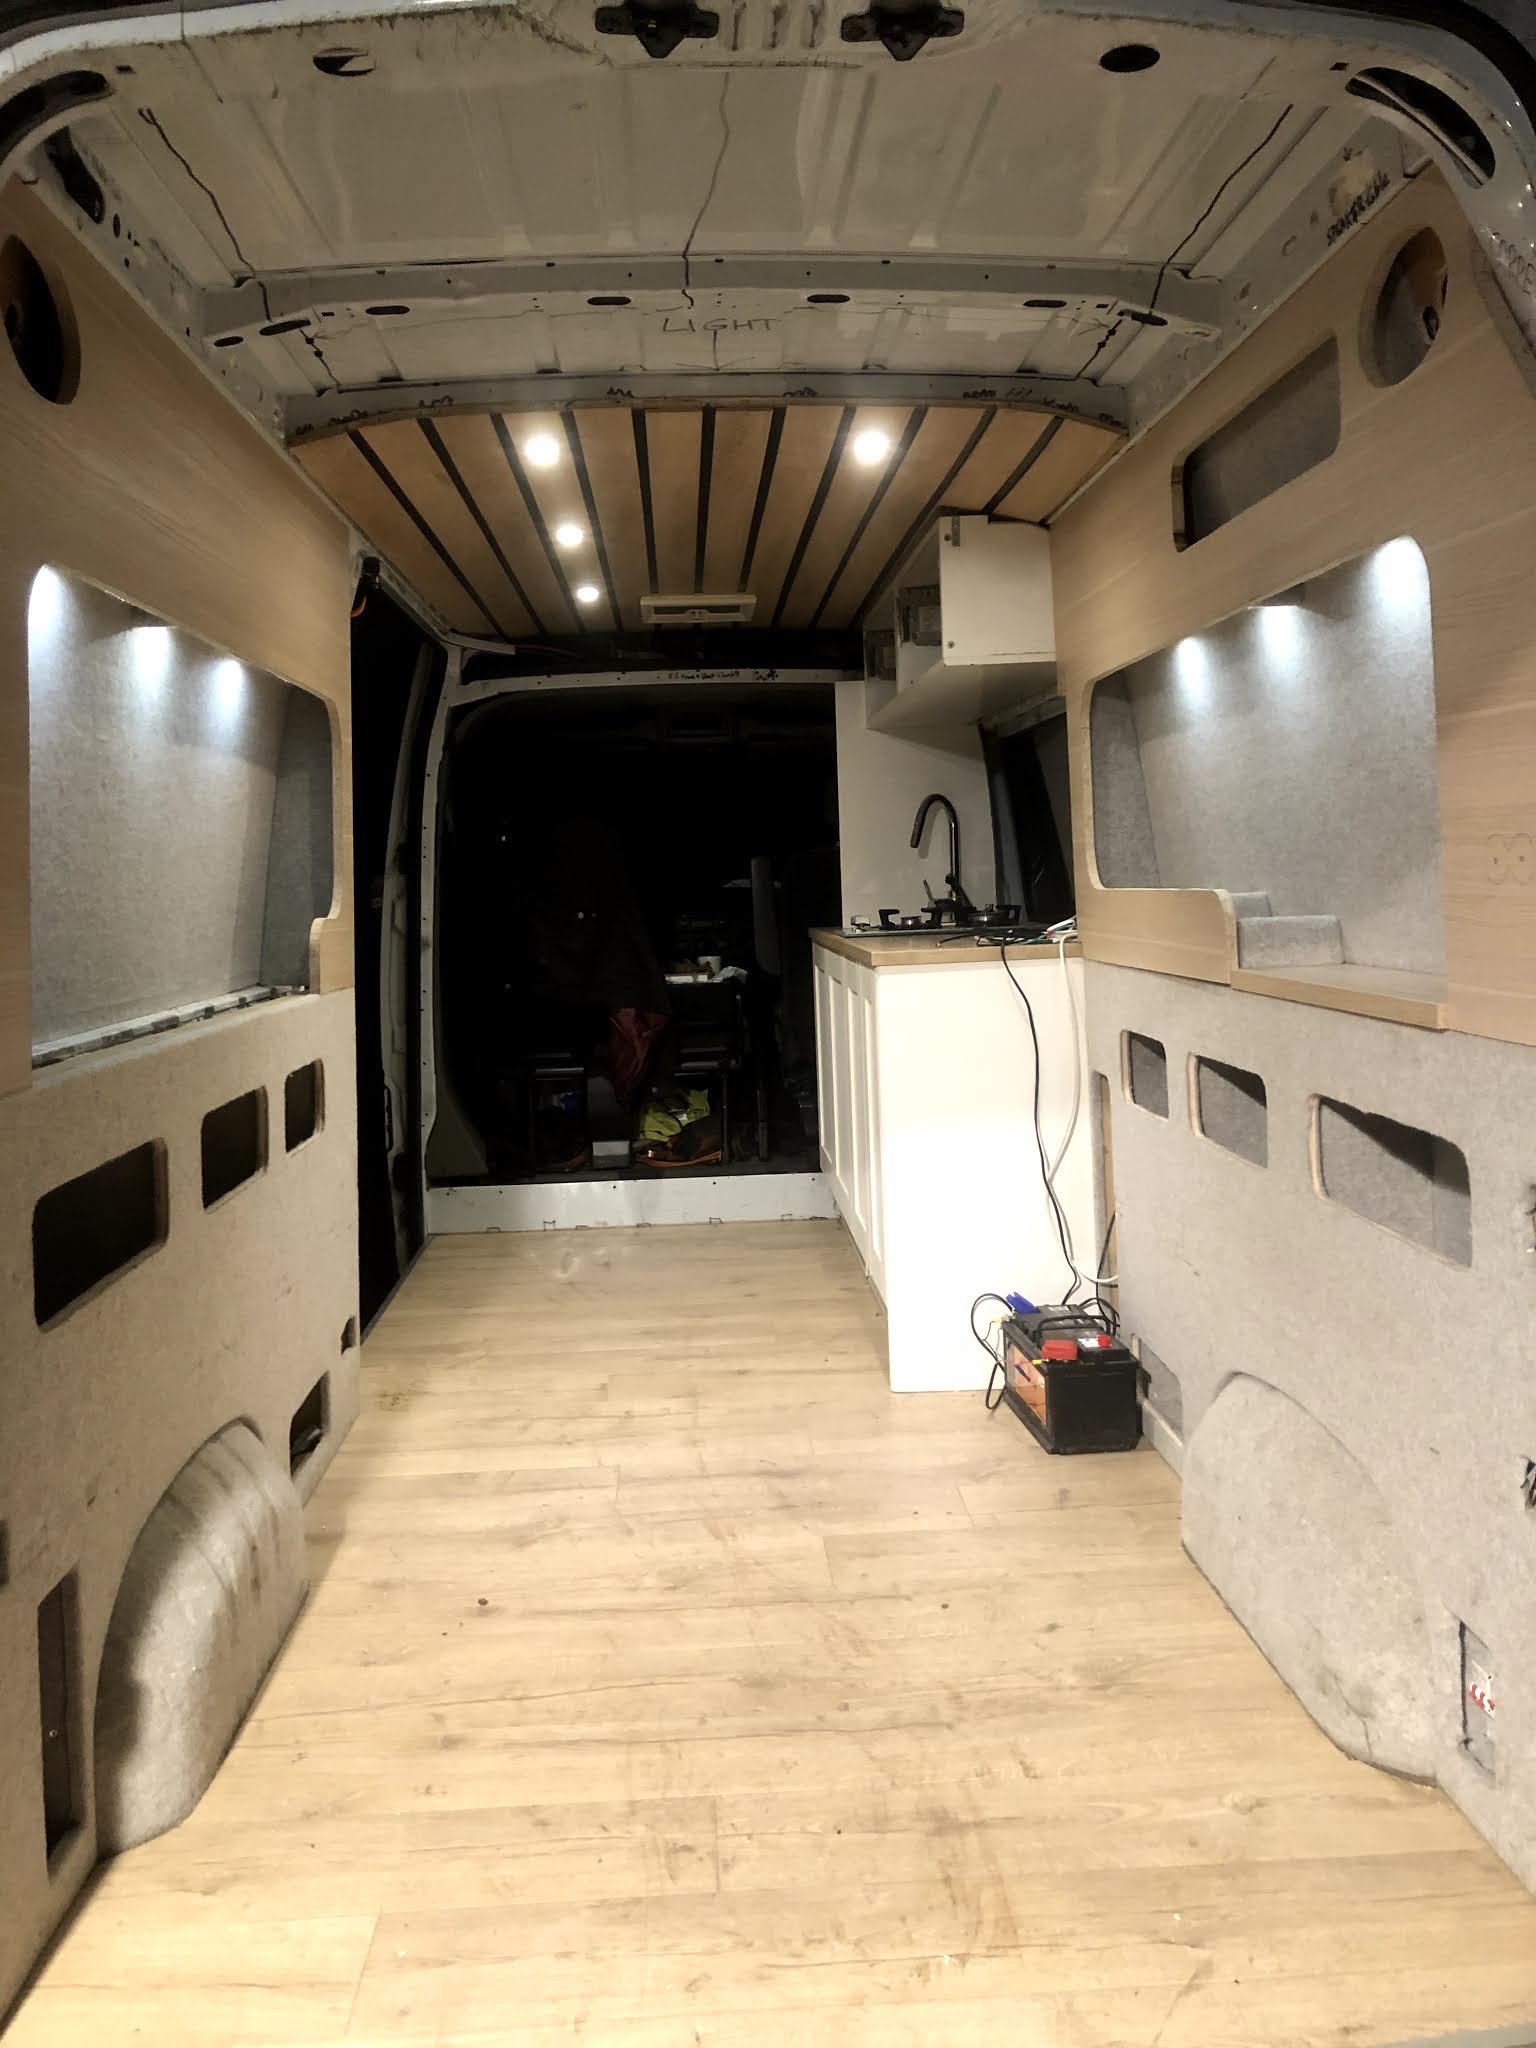
Welcome

WELCOME


Welcome to the blog for our campervan build

This project began in May 2020 during the 'lockdown' in the UK due to COVID-19. We were supposed to be touring Europe in our existing camper conversion 'Movano The Van Hoe' but this obviously wasn't going to be possible... So after finishing a pretty ambitious Hot Tub Trailer build (see the blog here) we decided we needed another project to keep us occupied during however many weeks left of lockdown.

We put Movano The Van Hoe up for sale and bought a Renault Master which we will convert over the coming weeks/months.

We are fortunate in that Elliot has a fully equipped workshop with tools and space to work, and we're also fortunate in that this is Elliot's second camper conversion, so we're not totally winging it!

This is a blog of the full build and I make no apologies that it is very photo heavy. The primary purpose of the blog is to document this build both for our own records, and for anyone else who's interested.

We plan on touring around Scotland with our Trailer Hot Tub when travel restrictions are relaxed enough to allow this.

Disclaimer: This is NOT meant as a tutorial. Do not try this at home. Always seek professional expert advice.

Wednesday 18 November 2020

TV & Sound System

Multimedia!

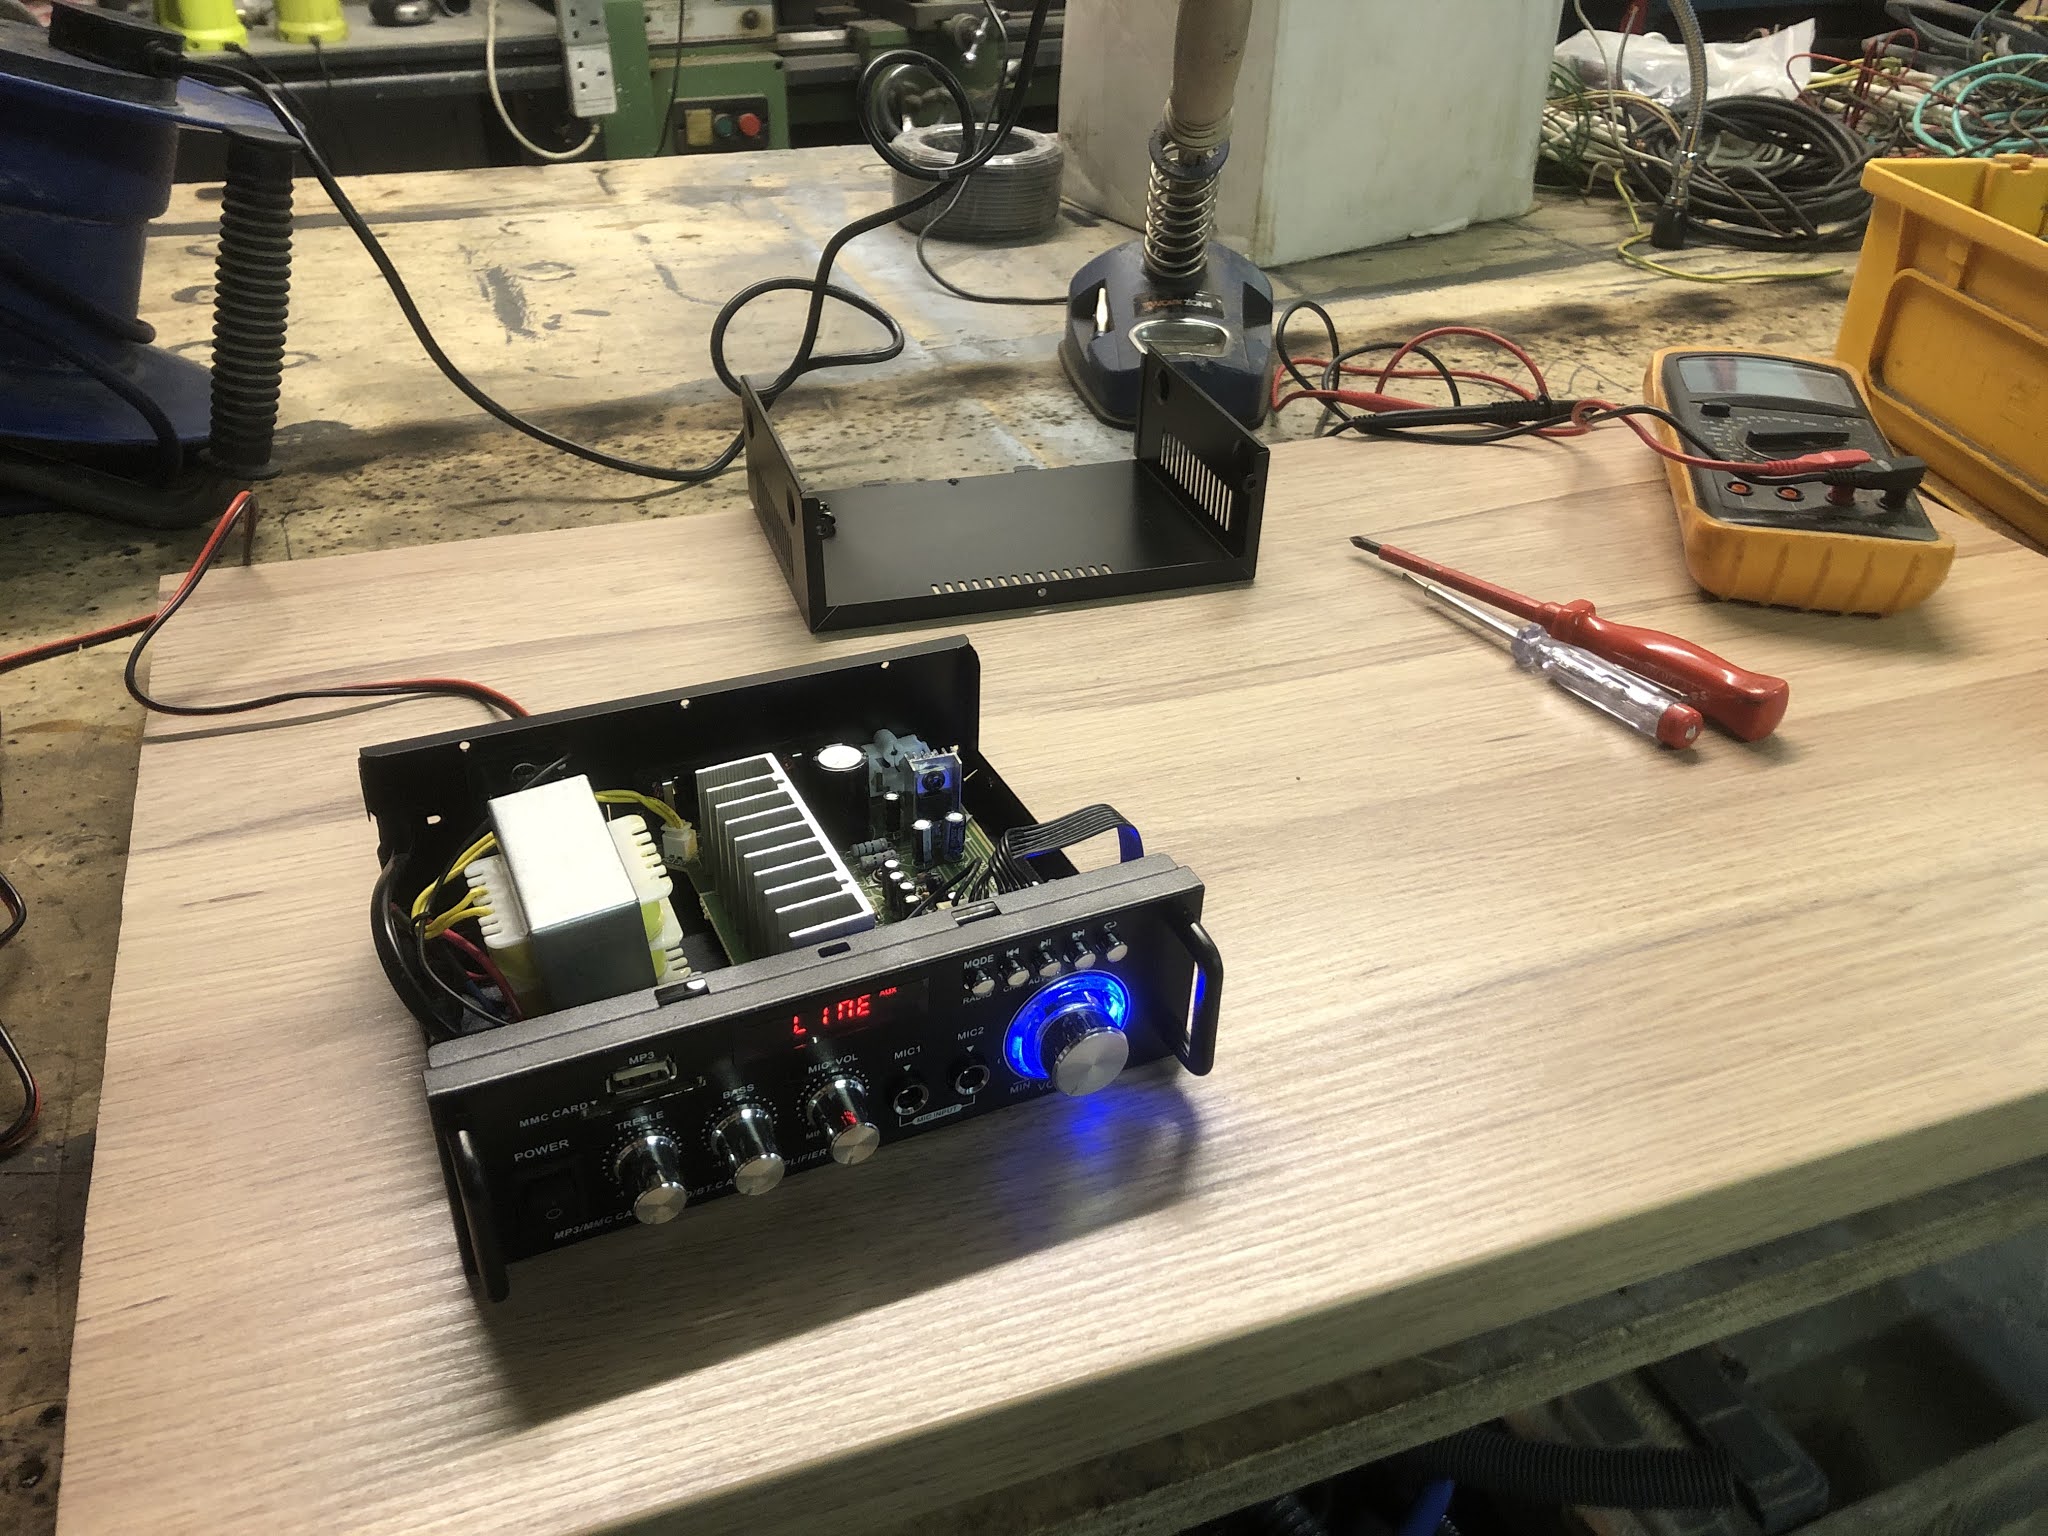
We've got a pretty sweet media system in Master 'Splores. This includes a Sharp 24" Smart LED DVD 12v/24v TV on a full motion wall mounted bracket with retaining clip so it can fold away neatly and securely when not in use. This can connect to a mobile hotspot to allow access to Netflix, Prime Video etc, or when we're out of phone signal, we can watch movies directly from a USB stick/DVD when in the wilderness. Connected to the TV we have a 600W Stereo Amplifier with Bluetooth connectivity and 6x9 Pioneer Speakers for cinema quality surround sound. 

It gets a bit more complicated... 

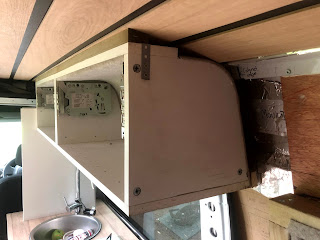
The amplifier was stripped down and modified to be able to mount shallower in the wall without cables plugged into the rear of it. The 230v transformer was removed and the power switch on the front wired to the 12v supply instead.  The 12v in, audio line in, and speaker output connections were all removed and hard wired to the main circuit board allowing the wiring to exit out the side of the unit.

Eh... and there's also 2 microphone inputs... For van karaoke...?


Sunday 15 November 2020

Upholstery

We have designed the cushions in the back of the van to function both as seating with a base and back cushion, and as a mattress, forming a full king size (200 x 150cm) bed.

We've chosen to use 100mm reflex foam professionally upholstered in durable black fabric (Balmoral Textiles) by the wonderful Greg (Greg Upholstery) in Edinburgh.

The fabric covers are stain resistant, removable and washable.

Just having these soft furnishings in place makes the van feel almost finished and they are SUPER comfy.


Tuesday 27 October 2020

Fabrication and installation of the table

The table is fashioned out of the same 18mm melamine faced chipboard (MFC) in 'Kaisersberg Oak' as the main parts of the walls, from Meyer Timber.

The table is made of two identical rectangles of MFC, which are hinged and sit folded when in 'table mode' and hinge out to form the middle part of the bed when in 'bed mode'

The MFC was cut to size, and the edges planed smooth.

The edges are then trimmed using matching laminate edge trim, also from Meyer Timber, affixed using Evo-Stik impact adhesive


Once the adhesive is dry the excess trim is carefully trimmed off using a sharp blade.


The two table panels are hinged using a piano hinge.


Next we contemplate where the table leg will go... Taking into account ease of squeezing in past the table to the seating, option to add an extra seat at the very back of the van for an extra friend, and checking the underside of the van chassis for bad stuff to drill into.


Hole drilled, we can then install the Fiamma table leg. The recessed connection is installed into the floor first. Then the conic connection affixed to underside surface of the table. 


Yeaaah we have a table! 

The table top can be detached from the leg, dropped down onto a custom made ledge on the seats, folded out, and then cleverly forms the middle portion of the bed.


Thursday 15 October 2020

Fabrication of the folding seating/bed Part #2

So ages ago we fabricated the seating/bed from 25mm x 25mm x 1.5mm square section steel tubing... And then didn't really get around to sending it to the powder coaters.


But today it's been sent off to Pentland Powder Coating to be coated in Anthracite Grey RAL 7016.

Meanwhile, we finish off the tops of the benches. We've painted them black, and are drilling holes to ensure adequate ventilation of the cushions/mattress.


We're also creating opening hatches in the top of each bench, to allow access to the storage space underneath.


The wood tops are fitted with stainless steel hinges to allow them to fold up flush with the wall and out of the way so Master Splores can be used as a regular van...


Aaaaaand the next day the frames are back from the powder coaters and are looking SHINY AF!


We attach the black wooden tops onto our new shiny frames... 


We've already made some furry Veltrim-coated panels for the front face of the seating... 


Time to assemble it all together....


Yessss we have seating!!! 


The table will drop down onto comfy furry little ledges to form the middle part of the bed...

To allow for easy access to the storage underneath the seats, we've cut hinged access panels


Overhead cabinets

Now that the ceiling is up we can build the overhead cabinets and get them installed. 

We started with B&Q 300mm base cabinets, turned on their side, and then templated a curve to match the walls and roof of the van.


The cupboards were then cut to shape, and a section of 3mm aircraft plywood was cut to form the rear curved portion of the cupboards. This was trimmed in Veltrim and glued and pinned into place on the units.


We had already installed additional timber battens behind the ceiling for the cupboards to securely screw into at the top. The back of the cupboard screws into a batten on the wall, and the cupboards are also supported by a section of alloy angle screwed onto the batten. Rock solid!


Auto lifting hinges were installed and the doors ready to fit. The cupboards will have internal automatic lights in them and there will also be lighting on the underside of the units for the kitchen area.


The doors fitted match the base cabinets.


They're finished off by adding chrome 'finger holes' for opening, and adjusting the hinges slightly so the doors do not hit the ceiling.