Welcome

WELCOME


Welcome to the blog for our campervan build

This project began in May 2020 during the 'lockdown' in the UK due to COVID-19. We were supposed to be touring Europe in our existing camper conversion 'Movano The Van Hoe' but this obviously wasn't going to be possible... So after finishing a pretty ambitious Hot Tub Trailer build (see the blog here) we decided we needed another project to keep us occupied during however many weeks left of lockdown.

We put Movano The Van Hoe up for sale and bought a Renault Master which we will convert over the coming weeks/months.

We are fortunate in that Elliot has a fully equipped workshop with tools and space to work, and we're also fortunate in that this is Elliot's second camper conversion, so we're not totally winging it!

This is a blog of the full build and I make no apologies that it is very photo heavy. The primary purpose of the blog is to document this build both for our own records, and for anyone else who's interested.

We plan on touring around Scotland with our Trailer Hot Tub when travel restrictions are relaxed enough to allow this.

Disclaimer: This is NOT meant as a tutorial. Do not try this at home. Always seek professional expert advice.

Tuesday 27 October 2020

Fabrication and installation of the table

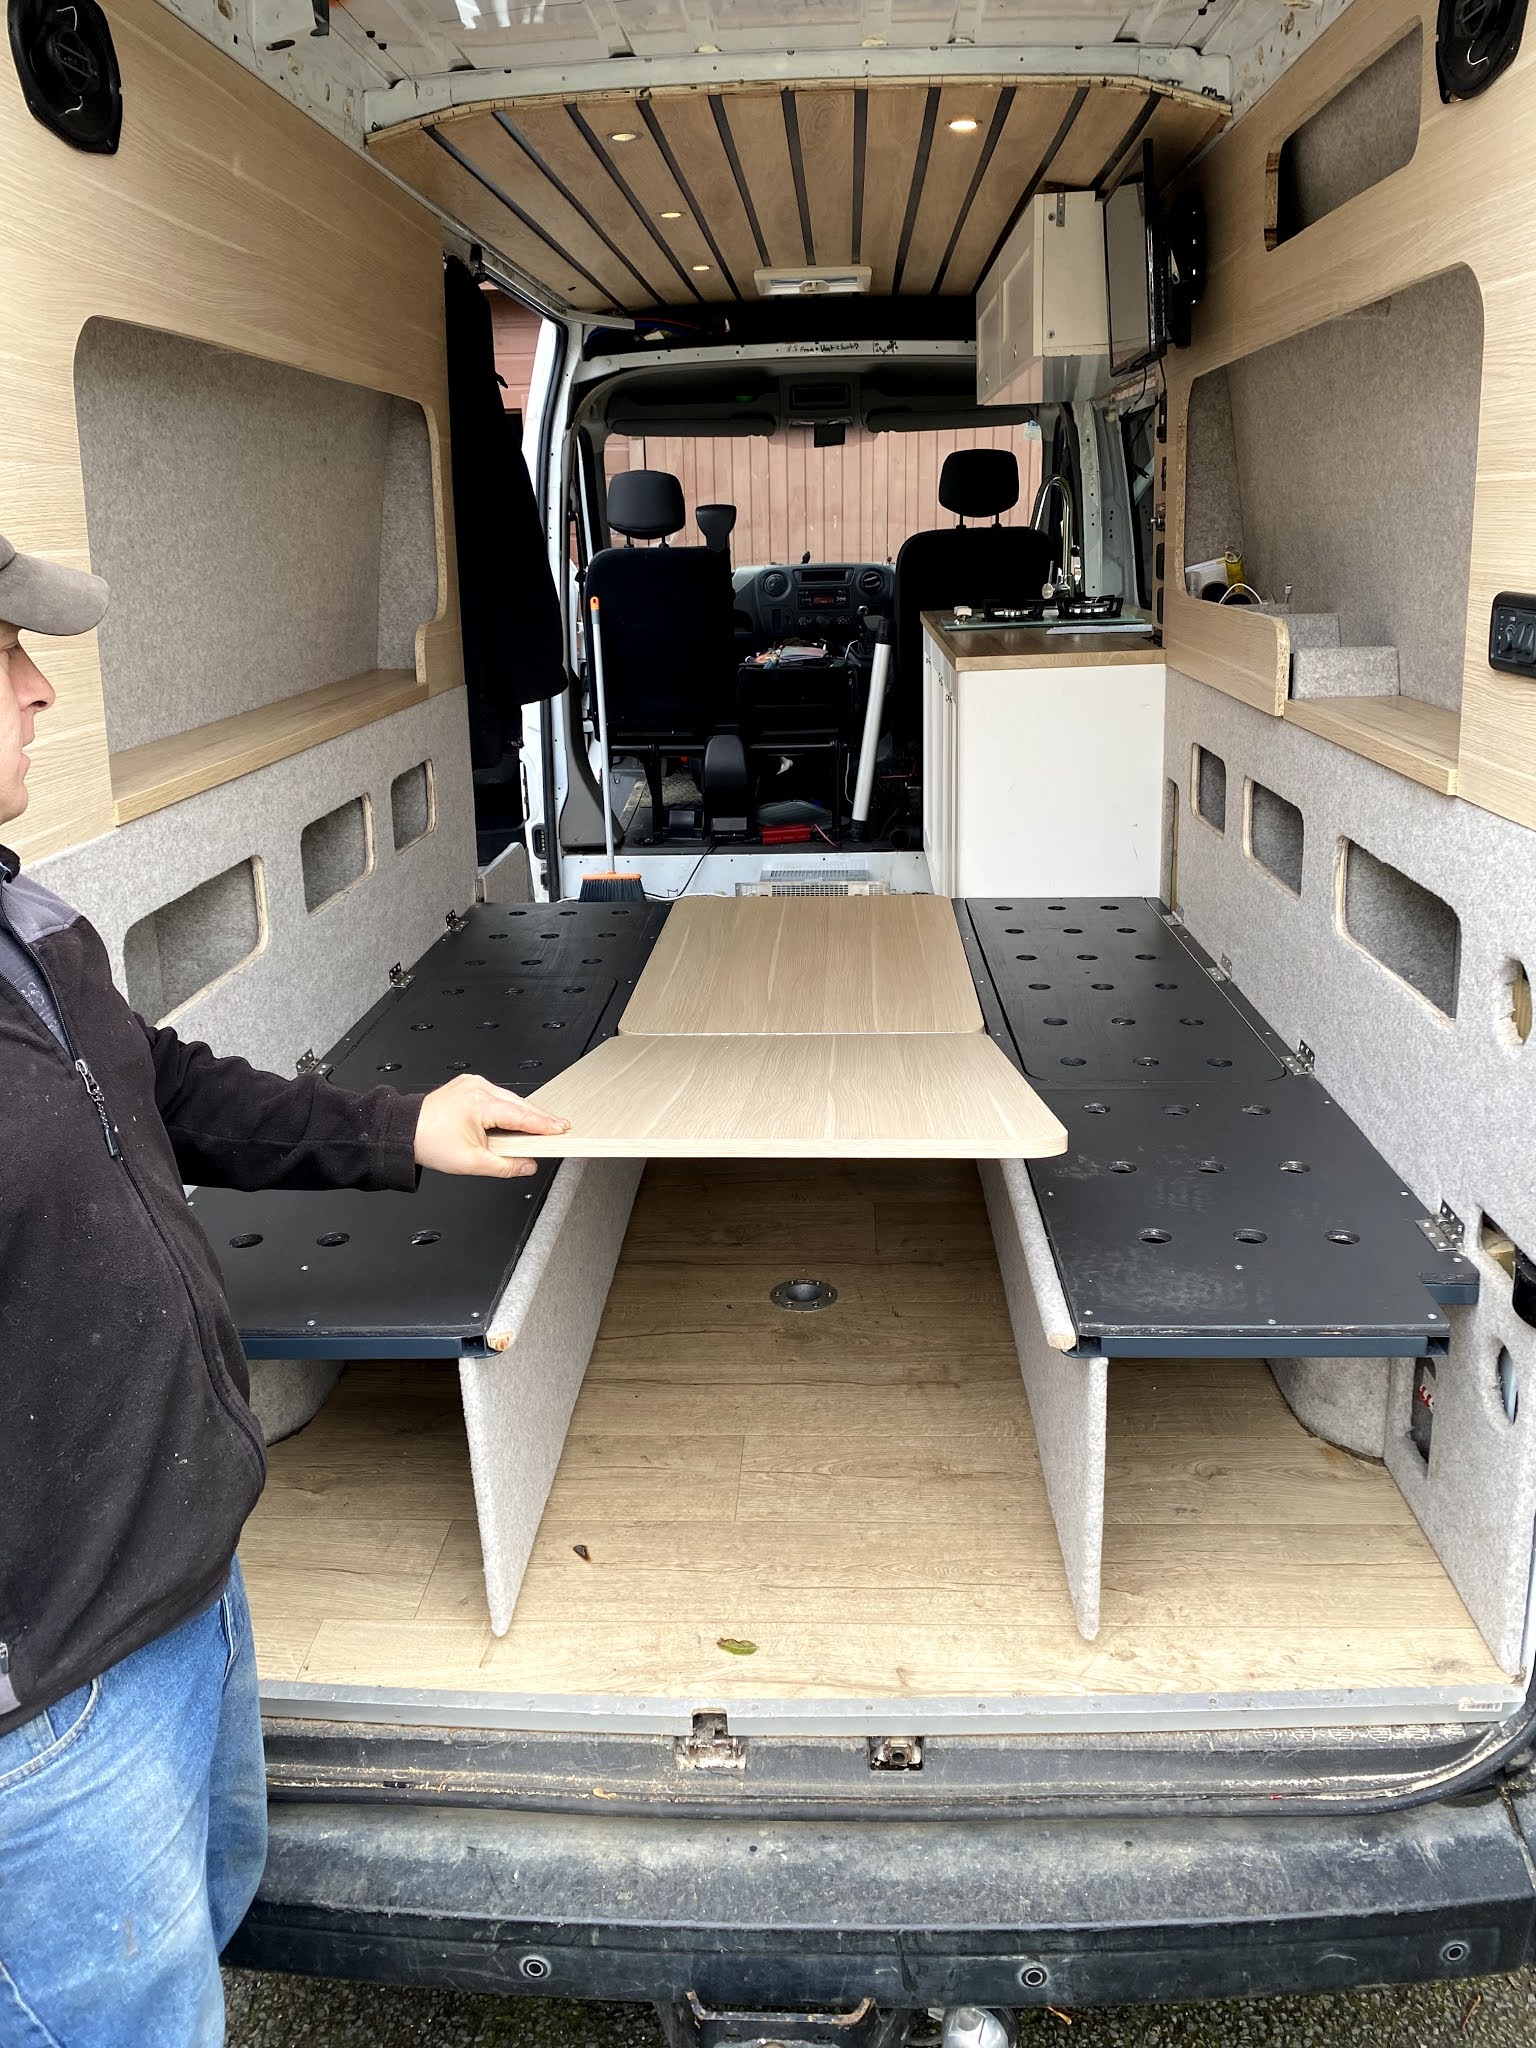
The table is fashioned out of the same 18mm melamine faced chipboard (MFC) in 'Kaisersberg Oak' as the main parts of the walls, from Meyer Timber.

The table is made of two identical rectangles of MFC, which are hinged and sit folded when in 'table mode' and hinge out to form the middle part of the bed when in 'bed mode'

The MFC was cut to size, and the edges planed smooth.

The edges are then trimmed using matching laminate edge trim, also from Meyer Timber, affixed using Evo-Stik impact adhesive


Once the adhesive is dry the excess trim is carefully trimmed off using a sharp blade.


The two table panels are hinged using a piano hinge.


Next we contemplate where the table leg will go... Taking into account ease of squeezing in past the table to the seating, option to add an extra seat at the very back of the van for an extra friend, and checking the underside of the van chassis for bad stuff to drill into.


Hole drilled, we can then install the Fiamma table leg. The recessed connection is installed into the floor first. Then the conic connection affixed to underside surface of the table. 


Yeaaah we have a table! 

The table top can be detached from the leg, dropped down onto a custom made ledge on the seats, folded out, and then cleverly forms the middle portion of the bed.


No comments:

Post a Comment