Welcome

WELCOME


Welcome to the blog for our campervan build

This project began in May 2020 during the 'lockdown' in the UK due to COVID-19. We were supposed to be touring Europe in our existing camper conversion 'Movano The Van Hoe' but this obviously wasn't going to be possible... So after finishing a pretty ambitious Hot Tub Trailer build (see the blog here) we decided we needed another project to keep us occupied during however many weeks left of lockdown.

We put Movano The Van Hoe up for sale and bought a Renault Master which we will convert over the coming weeks/months.

We are fortunate in that Elliot has a fully equipped workshop with tools and space to work, and we're also fortunate in that this is Elliot's second camper conversion, so we're not totally winging it!

This is a blog of the full build and I make no apologies that it is very photo heavy. The primary purpose of the blog is to document this build both for our own records, and for anyone else who's interested.

We plan on touring around Scotland with our Trailer Hot Tub when travel restrictions are relaxed enough to allow this.

Disclaimer: This is NOT meant as a tutorial. Do not try this at home. Always seek professional expert advice.

Sunday, 7 June 2020

Framing Part 2 - and SO MUCH MEASURING...

Today we've finished the framing by doing the same on the other side of the van. Next we measure all the 'walls' of each little 'cupboard' space


These are measured out onto 5mm ply and cut out using a handsaw.

.   


Each 'wall' is carpeted using Veltrim...


Each carpeted panel is glued and screwed into place. Now we have some furry cupboards!


Friday, 5 June 2020

Framing part 1

Today we started to frame what will be the walls/cupboards/cubby holes/undecided what's actually happening with the walls yet...

To make the frame of the walls, we've used 75x45mm timber to form the main supports for the wall/cupboard/bed structure. The timber is both screwed and glued to the body of the van using Sikaflex, , and secured to the ply with little brackets. So it's super secure. 


The non-structural parts are made using 38x25mm timber, which again is glued and screwed.


This is the main structure of the wall/shelf/cupboards... 


Wednesday, 3 June 2020

Nonsense

We've pretty much finished insulating the van now. A small note about spray expanding foam... Now we've been using the Soudall expanding foam. However Screwfix do their own, slightly cheaper expanding foam, from the 'No Nonsense' range, so we thought we'd use that for filling the rib channels. Let me tell you, that shit is FULL OF NONSENSE. It expands so much and gets up to no good and needs close adult supervision!! The Soudall stuff sets quickly like a perfectly toasted marshmallow, but the No Nonsense stuff expands and expands and is soggy and wet and a big mess.


We actually needed to form a makeshift 'bib' from plastic bags to contain the nonsense while it dried... 


Once it was finally dry and had finished it's expandy-party, the excessive excess was cut off using a bread knife


Now that the insulation is in place, we can screw on the ply we created earlier. This is both glued using Soudall adhesive foam, and screwed directly to the body of the van using self-drilling screws. 


We leave ourselves little notes for things we've realised we've not done, or things we need to remember to do in the future... 


We've also sort-of planned where all our 'controls' will be placed...


Monday, 1 June 2020

Welding stuff... The fabrication of the bunk bed!

So after approximately 309 cumulative hours of Elliot scratching his head, looking at the van, and measuring my shoulder width, he's designed a system for a removable bunk bed which will sleep a third person should we want to bring a pal on adventures (that doesn't want to middle-spoon with us!) The removable bunk can also be used for extra overhead storage (thinking bulky jackets, inflatable paddle boards...)

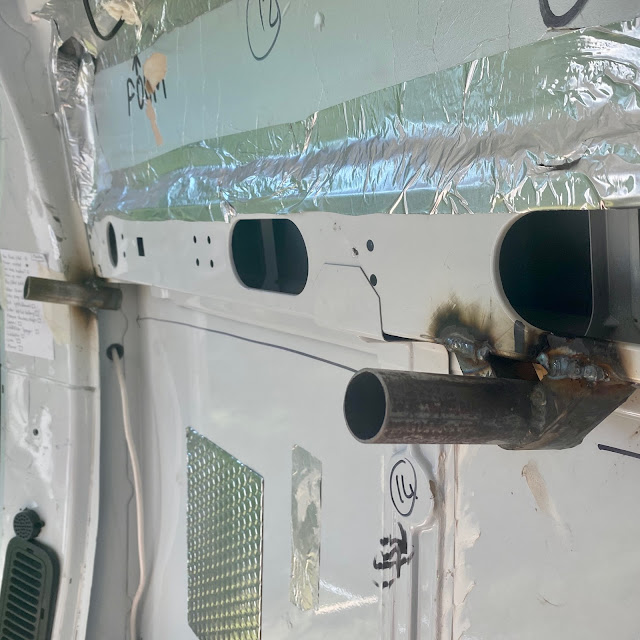
Elliot has made four steel guides/supports that will house two steel poles that will form the 'sides' of the bunk bed, which will itself be made of strong stretched canvas (kind of like a stretcher).

The two 12mm side walls (yet to be installed) will provide most of the structural support for the bunk bed.


These steel supports were welded directly to the structure of the van. The poles will be able to slot into the supports with a button clip mechanism so they're secure, yet easily removable. The steel supports are sealed at the back so that there is no risk of condensation forming. 


The supports have been painted with 'trade spray' (I've no idea what 'trade spray' is...) 


While all this clever fabricating was going on I have washed the outside of the van, cleaning off all the old signwriting with acetone. Master 'Splores is looking MINT! 

We've also affixed six of the carpeted ply panels using Sikaflex, and fixed in the last bits of wall insulation.


(The wood and bits of insulation are there purely to hold the panels in place while the glue sets)

"I don't think I need to pose so much..."


Friday, 29 May 2020

We cut a hole in Master 'Splores...

So today the side window arrived!! 

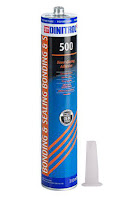
We've got a fixed bonded glass window with the privacy glass for the driver's side, purchased from Leisure Vehicle Windows. It comes in a kit with the bonded glass side window, isopropyl alcohol wipes to clean the surfaces, Dinitrol 530 glass/paint primerDinitrol 500 fast-cure bonding adhesive, and edging trim. 


First things first... Read the instructions!!!


First we marked out inside where the window would be to make sure we were happy with that. 


We then removed the vertical struts from the window area using a grinder.


We then very accurately marked out where the window would come to on the outside.


Pilot holes were drilled first...


Then the curved corners were cut out using a drill-operated nibbler...


The straight parts were cut using a jigsaw...


 ... and then we were faced with a GIANT HOLE.


We trimmed the edge of the hole with the supplied black edge trim, which was cut to length.


The ceramic surround of the window unit was first cleaned of any grease with the supplied isopropyl alcohol wipes, and then it's primed using the Dinitrol 530 glass/paint primer also supplied in the kit. This is also used to prime the edge of the van body where the adhesive will stick... This is left to dry for 10 minutes...


Then the Dinitrol 500 fast-cure bonding adhesive is applied in a continuous bead around the periphery of the window-hole... 


The window is lifted into place, smooshed onto the adhesive and held in place for ten minutes (this was a two-person job so there's no photos!)

Then it's taped up and left overnight to cure...


Today we also worked on more of the ply lining. We've now got almost all of the insulation in place. More panels were measured and ply wood cut to size. Carpet was glued onto these again with spray adhesive. 

They are ready to glue into place now...