Welcome

WELCOME


Welcome to the blog for our campervan build

This project began in May 2020 during the 'lockdown' in the UK due to COVID-19. We were supposed to be touring Europe in our existing camper conversion 'Movano The Van Hoe' but this obviously wasn't going to be possible... So after finishing a pretty ambitious Hot Tub Trailer build (see the blog here) we decided we needed another project to keep us occupied during however many weeks left of lockdown.

We put Movano The Van Hoe up for sale and bought a Renault Master which we will convert over the coming weeks/months.

We are fortunate in that Elliot has a fully equipped workshop with tools and space to work, and we're also fortunate in that this is Elliot's second camper conversion, so we're not totally winging it!

This is a blog of the full build and I make no apologies that it is very photo heavy. The primary purpose of the blog is to document this build both for our own records, and for anyone else who's interested.

We plan on touring around Scotland with our Trailer Hot Tub when travel restrictions are relaxed enough to allow this.

Disclaimer: This is NOT meant as a tutorial. Do not try this at home. Always seek professional expert advice.

Wednesday, 1 July 2020

Gas Installation

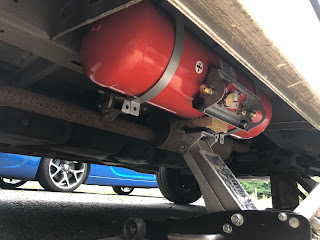
The gas system has arrived from LPGshop.co.uk! We've got a 30 litre gas tank that will fit under the van between the main chassis rail and the sill. We've opted for an underslung gas tank as it frees up more storage space within the van and is easy to top up, so running out of gas is less likely! We will also have a Livello LPG gauge mounted to our control panel so we can easily see the remaining level from inside the van.


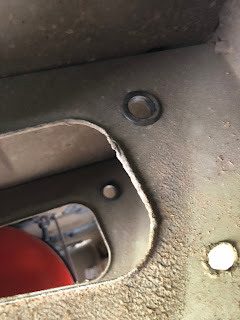
The tank is jacked up into place and holes for the mounting straps marked and drilled through the van floor. These bolts will still be accessible from inside the van by removing the drawer should we ever have to renew these fixing straps in the future.


The Angle of the tank is very important so that the 80% cutoff works and that no liquid LPG can exit the tank into the regulator. Once the angle of the tank is set using a gauge, the rubber straps are fitted to the steel mounts and the tank is secured.


The filling point is mounted just under the pillar on the driver's side.  We decided to reinforce the bracket by welding another tab onto it, the bracket is then sealed and riveted onto the inner sill and outrigger.


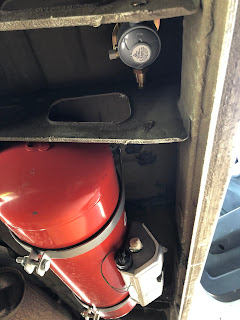
The 2 stage regulator is mounted to the underside of the van floor as high as possible with the test port easily accessible. Holes are drilled and grommets inserted and the pipes made up to connect the regulator to the tank.  Pipe is made up to connect the fill point to the tank also.  All gas pipework under the van is done in 8mm rubber coated copper pipe.


Inside the van the gas comes into a 2 way manifold mounted in our utility cupboard which will house the Truma Combi 4e heater, bin, cleaning stuff and tools etc.

The screw holes in the manifold wouldn't give it much support drilled into the chipboard cupboard so these holes were tapped and threaded to take an m5 bolt to securely clamp it to the cupboard.






No comments:

Post a Comment